I am working on a bag which will be donated to my congregation's annual auction. I am following Barbara Randle's Crazy Quilting with Attitude book, specifically her pattern for the mega/diaper bag.
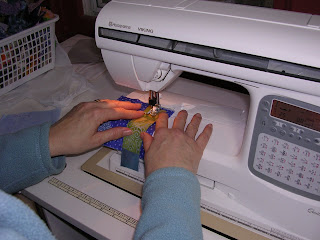
Here's is a shot of my table area while I was in the embellishing process. What fun to add embroidery, buttons, beads and appliqué shapes.
Below are the four crazy quilted panels for front, back and the two side pockets.
And of course, there has to be a spider web and a spider. The spider brings good luck.
I am enjoying dreaming of who might purchase the bag, and what they might use it for. I hope they will enjoy using it as much as I have enjoyed creating it. I will post more as I progress.
Sunday, February 25, 2007
Sunday, February 18, 2007
Bag for Karen and emergency coasters
This little bag is for my sister Karen, she wanted one to carry small books. I finished it up Friday evening. I hope this is a good size for her. It also has clown fabric, in honor of Suzy the Love Clown, our own (very funny) mother. I will mail it off to her tomorrow.
I didn't get to much sewing done this weekend, we had a Chinese New Year and Domino's party on Sat night so the focus was on prepping the house and cooking. I realized that we would be playing Domino's on our cherry dining room table, so I made up some emergency coaters, see below.
Happy New Year, the year of the Pig. May you be blessed with happiness and good fortune.
Wednesday, February 14, 2007
Sewing on cards
David's valentine to me and mine to him. He knows me well enough to know that I will recycle the cute little pink ribbon. The valentines were photographed out on the grill, in the snow, we bar-b-q on this day regardless of the weather.
My card to him has several hearts, all sewn on with my sewing machine and free motion stitching. I thought about putting on 30 for the years we have been married, but it seemed like that would be a bit too busy for this small canvas.
Wednesday, February 7, 2007
Fabric valentine post cards
I am going to try to mail two fabric valentines. Both have cardboard in the center and are 5 x 7 inches. I am not sure about affixing the stamp. I will stop at the post office tomorrow am and see what they advise. I will be very curious to see how they fare after their travel through the mail system.
This first is for my son and his wife, newlyweds, very simple and classic.
...and this one is for my younger adult son, more jazzy and spontaneous. I just love crazy quilting. The hearts are sew on, free motion. I purposely made the edges kind of scrappy, it seemed to be the right kind of finish for this one.
I don't think they are reading my blog, if so, the surprise will be spoiled. We will see.
Sunday, February 4, 2007
Grocery bag tutorial - updated 9/28/07
I have been making grocery bags form extra fabric in the stash. These two I made from an upholstery remnant that I purchased for $1.50 at a thrift store. I usually put a pocket on the front, made from scraps. I donate the bags to my congregation where they are sold for ~$10. oo each. The bags are reusable, a "green" alternative to the usual "paper or plastic".
The pattern is made from a paper grocery bag.
I made a mini version to show how it is sewn together.
Sew the bottom and side seams first. I cut this one on a fold, so it has only one side seam. Then pull the bottom and the side together to sew the remaining bottom seams. See below.
On the larger bags I turn over the top and add carry handles. This little one I lined and used ribbons for the handles.
I had so much fun making the large bags and the mini one, I decided to make a small one that is book size. This is also re-use of sorts. In the fabrics I inherited from my mother there was a bag of several fussy cut butterfly's. So here is a butterfly book bag, with polka dot lining and old buttons for decoration.
Here are the instructions for adding handles to these unlined bags. I make handles from a 4 inch wide piece of fabric, folded in half and then quarters, sew along each side about 1/4 inch in.
Mark the center of the bag on both sides and then make a mark 2 and one half inches on either side of the center point. You will have 5 inches between the handles.
Fold over the top of the bag one inch and then one inch again, press. Place the end of each handle at the mark, slipping it under the fold. Then fold the handle up so that you now have two layers of handle under the folded top.
Here are all 4 handle bases pinned in place and ready to sew down.
I then sew along the top of the bag at the base of the folded edge, when I come to a handle I sew up and around the square and end with two diagonals to form an X.
This makes for a nicely reinforced handle anchor and the double fold over at the top of the bag gives it nice body.
The pattern is made from a paper grocery bag.
I made a mini version to show how it is sewn together.
Sew the bottom and side seams first. I cut this one on a fold, so it has only one side seam. Then pull the bottom and the side together to sew the remaining bottom seams. See below.
On the larger bags I turn over the top and add carry handles. This little one I lined and used ribbons for the handles.
I had so much fun making the large bags and the mini one, I decided to make a small one that is book size. This is also re-use of sorts. In the fabrics I inherited from my mother there was a bag of several fussy cut butterfly's. So here is a butterfly book bag, with polka dot lining and old buttons for decoration.
Here are the instructions for adding handles to these unlined bags. I make handles from a 4 inch wide piece of fabric, folded in half and then quarters, sew along each side about 1/4 inch in.
Mark the center of the bag on both sides and then make a mark 2 and one half inches on either side of the center point. You will have 5 inches between the handles.
Fold over the top of the bag one inch and then one inch again, press. Place the end of each handle at the mark, slipping it under the fold. Then fold the handle up so that you now have two layers of handle under the folded top.
Here are all 4 handle bases pinned in place and ready to sew down.
I then sew along the top of the bag at the base of the folded edge, when I come to a handle I sew up and around the square and end with two diagonals to form an X.
This makes for a nicely reinforced handle anchor and the double fold over at the top of the bag gives it nice body.
Saturday, February 3, 2007
Cyberspace Silent Poetry Reading - one day late
I just found out that Feb 2, Feast of Brigid and Groundhog Day, is also a day to post a poem as part of an annual cyberspace silent poetry reading. This was started by Reya www.goldpoppy.blogspot.com. Here is one from one of my favorite poets. Happiness | |
by Jane Kenyon | |
There’s just no accounting for happiness, |
Subscribe to:
Posts (Atom)